Update Model Status using Toggles in Laravel
In this short tutorial, we will implement the user's model status update functionality using JQuery and Switchery.

In this short tutorial, we will implement the user's model status update functionality using JQuery and Switchery. We will be using jQuery along with Switchery to change the boolean value of a user model and showing notifications using Toastr.
Here is the preview of what we will be trying to make today.
So let's starting coding.
Creating a Laravel Application
We will start by creating a new Laravel application if you have already then you can skip this section.
Open your command line terminal and run the below command to create a Laravel project using composer.
composer create-project laravel/laravel SampleAppCreate a sample database for this application and add it to the .env file. Once you have your application installed, head over to the .env file and update the database credentials.
Updating User Migration
Laravel provide a User model and it's migration out of box. Open the user's migration file from database/migrations folder and update the up() method with the below one.
/**
 * Run the migrations.
 *
 * @return void
 */
public function up()
{
    Schema::create('users', function (Blueprint $table) {
        $table->bigIncrements('id');
        $table->string('name');
        $table->string('email')->unique();
        $table->boolean('status')->default(0);
        $table->timestamp('email_verified_at')->nullable();
        $table->string('password');
        $table->rememberToken();
        $table->timestamps();
    });
}
In the above method we simply added a new column status with boolean data type and set the default value to 0.
Open your command line terminal and run below command to migrate all tables.
php artisan migrateSeeding Users Data
Now, we will create some dummy users to our users table using Laravel's Model Factory. Laravel provides us a User factory, so we simply use that.
Open command line terminal and run the below command to load the Tinker utility.
php artisan tinkerOnce Tinker loaded, run the below command.
factory('App\User', 10)->create();This will create 10 users in your users table.
Creating Required Routes
Next, we will open the web.php file from routes folder and romove the default route in it.
Add the below routes to your web.php file.
Route::get('/', 'UserController@index');
Route::get('/status/update', 'UserController@updateStatus')->name('users.update.status');
We have created two routes first one is the root of your application and another one we will use to change the status of a user.
Creating User Controller
Now, we will create a UserController which we have used on our routes. Run below command to generate this controller.
php artisan make:controller UserControllerNow, open the UserController file from app/Http/Controllers folder and add the index() method in it.
namespace App\Http\Controllers;

use App\User;
use Illuminate\Http\Request;

class UserController extends Controller
{
    public function index()
    {
        $users = User::all();

        return view('welcome', compact('users'));
    }
}
In this method, we are loading all users and sending it to the default welcome view.
Creating User's List View
Now, we will open the welcome.blade.php file from resources/views folder and delete everything in it.
Add the below HTML markup code in it.
<!DOCTYPE html>
<html lang="{{ str_replace('_', '-', app()->getLocale()) }}">
    <head>
        <meta charset="utf-8">
        <meta name="viewport" content="width=device-width, initial-scale=1">
        <title>Laravel</title>
        <link href="https://fonts.googleapis.com/css?family=Nunito:200,600" rel="stylesheet">
        <script src="https://cdnjs.cloudflare.com/ajax/libs/jquery/3.4.1/jquery.min.js"></script>
        <link rel="stylesheet" href="{{ asset('css/app.css') }}">
    </head>
    <body>
    <nav class="navbar navbar-expand-md navbar-light bg-white shadow-sm">
        <div class="container">
            <a class="navbar-brand" href="{{ url('/') }}">
                {{ config('app.name', 'Laravel') }}
            </a>
        </div>
    </nav>
    <main class="py-4">
        <div class="container">
            <div class="row justify-content-center">
                <div class="col-md-12">
                    <div class="card">
                        <div class="card-header">Users List</div>
                        <div class="card-body">
                            <table class="table table-hover table-striped">
                                <thead>
                                    <tr>
                                        <th scope="col">#</th>
                                        <th scope="col">Name</th>
                                        <th scope="col">Email</th>
                                        <th scope="col">Status</th>
                                        <th scope="col">Created</th>
                                    </tr>
                                </thead>
                                <tbody>
                                    @foreach($users as $user)
                                        <tr>
                                            <th scope="row">{{ $user->id }}</th>
                                            <td>{{ $user->name }}</td>
                                            <td>{{ $user->email }}</td>
                                            <td>{{ $user->status }}</td>
                                            <td>{{ $user->created_at->diffForHumans() }}</td>
                                        </tr>
                                    @endforeach
                                </tbody>
                            </table>
                        </div>
                    </div>
                </div>
            </div>
        </div>
    </main>
    </body>
</html>
Now run your application using php artisan serve and you will be presented with a view something like below:

Adding Switchery Toggle Buttons
As you have noticed, in the status column we are printing 0 instead of a toggle switch. I will be using the Switchery to add the toggle buttons to this view.
First thing, we have to include the required switchery files in our view.
In your welcome.blade.php file add below js and css CDN link in the head section.
<link rel="stylesheet" href="https://cdnjs.cloudflare.com/ajax/libs/switchery/0.8.2/switchery.min.css">
<script src="https://cdnjs.cloudflare.com/ajax/libs/switchery/0.8.2/switchery.min.js"></script>
This will inject the required CSS and JS files for switchery. Next we will update the td section for user status column to below.
From this:
<td>{{ $user->status }}</td>To this:
<td>
<input type="checkbox" data-id="{{ $user->id }}" name="status" class="js-switch" {{ $user->status == 1 ? 'checked' : '' }}>
</td>
Next, add a script tag just after the main section of your view.
<script>let elems = Array.prototype.slice.call(document.querySelectorAll('.js-switch'));

elems.forEach(function(html) {
    let switchery = new Switchery(html,  { size: 'small' });
});</script>
In the above code, we have loaded all input checkboxes with a class js-switch and instantiated the switchery on them.
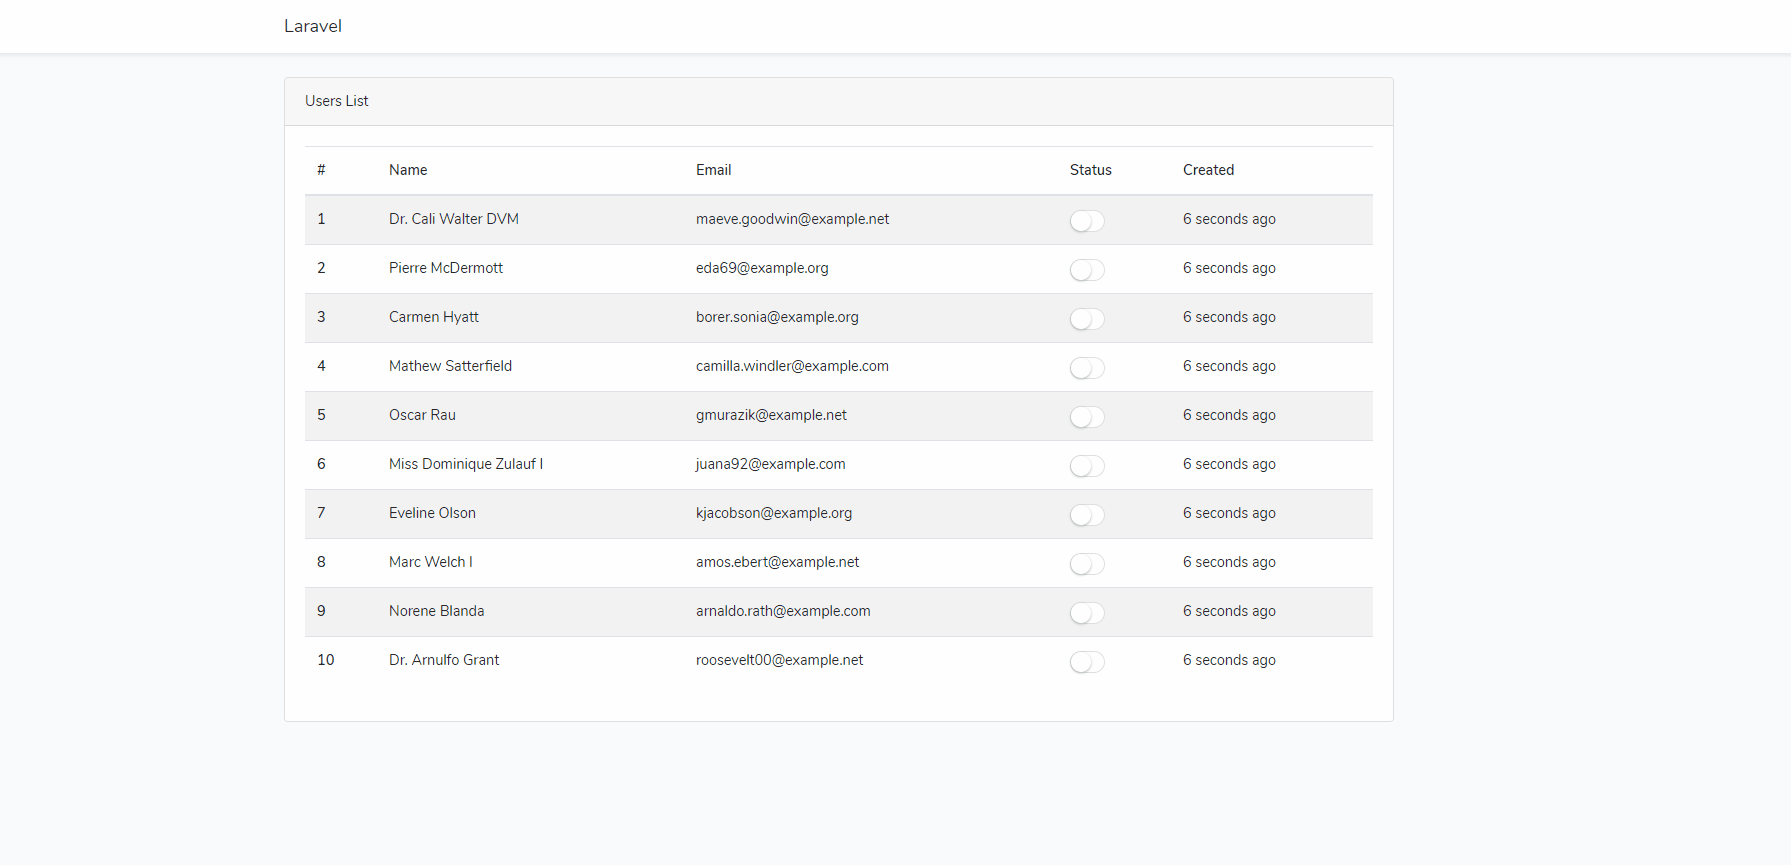
Now, if visit the / route, you will have the switches like below.

Sending Ajax Request to Update User's Status
Next, we want to send the Ajax request to our controller to change the status of a user when we change the state of these switches. As you have noticed in the input field of status we have added the data-id, which we will use to get the targeted user id and then send the request.
With the script tag after instantiating the switchery, add the below JavaScript code:
$(document).ready(function(){
    $('.js-switch').change(function () {
        let status = $(this).prop('checked') === true ? 1 : 0;
        let userId = $(this).data('id');
        $.ajax({
            type: "GET",
            dataType: "json",
            url: '{{ route('users.update.status') }}',
            data: {'status': status, 'user_id': userId},
            success: function (data) {
                console.log(data.message);
            }
        });
    });
});
In the above code block we are targeting any HTML element with a class js-switch which we have on every status input checkbox. Then on change we are getting the status from the input checkbox element using prop() method of jQuery.
Next, getting the user id using data() property.
Next, we are sending an Ajax request with type GET and sending the required data as JSON format. Also we are sending the request to users.update.status the route, on the success we are printing the message returned from the controller in the console.
Changing User Status in User Controller
Now, we will add the updateStatus() method in our UserController.
public function updateStatus(Request $request)
{
    $user = User::findOrFail($request->user_id);
    $user->status = $request->status;
    $user->save();

    return response()->json(['message' => 'User status updated successfully.']);
}
Above code will find the user by its ID and then set the status to whatever it is coming from the frontend. Then hit save to persist the changes to the database table.
Finally, we are sending the JSON response with a message.
Now, if you reload the page, and try to change the status for any user and it will change the record in the database.
Adding Toastr Notifications
So far, you have a fully functional toggle switch to update the status of a user. But as you have seen, when we change the status of a user we are not getting any notification (we have to check the console).
In this final section, we will add the Toastr notification. Open the welcome.blade.php file and add the below markup in the head section of your file.
<link rel="stylesheet" href="https://cdnjs.cloudflare.com/ajax/libs/toastr.js/latest/toastr.min.css">
<script src="https://cdnjs.cloudflare.com/ajax/libs/toastr.js/latest/toastr.min.js"></script>
We are using the CDN link to add Toastr library, we are free to use any other method like NPM or Yarn.
Now, within the success function of our ajax request, we will display a Toastr notification.
 success: function (data) {
    toastr.options.closeButton = true;
    toastr.options.closeMethod = 'fadeOut';
    toastr.options.closeDuration = 100;
    toastr.success(data.message);
}
As you can see in the above code, we are defining some Toastr settings and then showing the Toastr notification.
Now, if you visit the / route and try to change the status of a user, you will be presented with the Toastr notification.
Code Repository
You can find the code repository of this tutorial here.
If you have any question or comments please leave them in the comments box below.